Spawning evenly distributed mobs
After generating a few good looking random dungeons, I was puzzled with randomly placing mobs on resulting maps. To make it fair (and fun) for the player mobs should be evenly distributed.
The obvious idea was to pick coordinates randomly within the rectangular map boundaries, and then place mobs if they have floor underneath them. But this way I lose control of the number of mobs and risk having a chance of not placing any mobs at all. Plus, dungeons with bigger surface area would get more mobs - which sounds somewhat realistic, but not entirely what I was aiming for.
I could improve on the above by rerunning enemy placement multiple times and select the most favorable outcome - but the solution would be rather naive.
To have control over the number of mobs I decided to place them as I generate the rooms of the dungeon. There’s a trick one can use to get a random element with equal probability distribution from a sequence of an unknown size:
import random


def get_random_element(sequence):
    """Select a random element from a sequence of an unknown size."""
    selected = None
    for k, element in enumerate(sequence):
        if random.randint(0, k) == 0:
            selected = element
    return selected
With each iteration the chance of the current element to become a selected item is 1 divided by number of elements seen so far. Indeed, a probability of an element being selected out of a 4-item sequence:
1 * (1 - 1/2) * (1 - 1/3) * (1 - 1/4) = 1/2 * 2/3 * 3/4 = 6/30 = 1/4
Now all I had to do is to modify this to account for multiple mob placement.
Here’s a generalized function above which accounts for selecting n elements
from the sequence with even distribution.
import random


def get_random_element(sequence, n):
    """Select n random elements from a sequence of an unknown size."""
    selected = [None for _ in range(n)]
    for k, element in enumerate(sequence):
        for i in range(n):
            if random.randint(0, k) == 0:
                selected[i] = element
    return selected
I incorporated logic above into the room generation code, accounted for duplicates, and ended up with decent distribution results.
Randomly generated dungeons
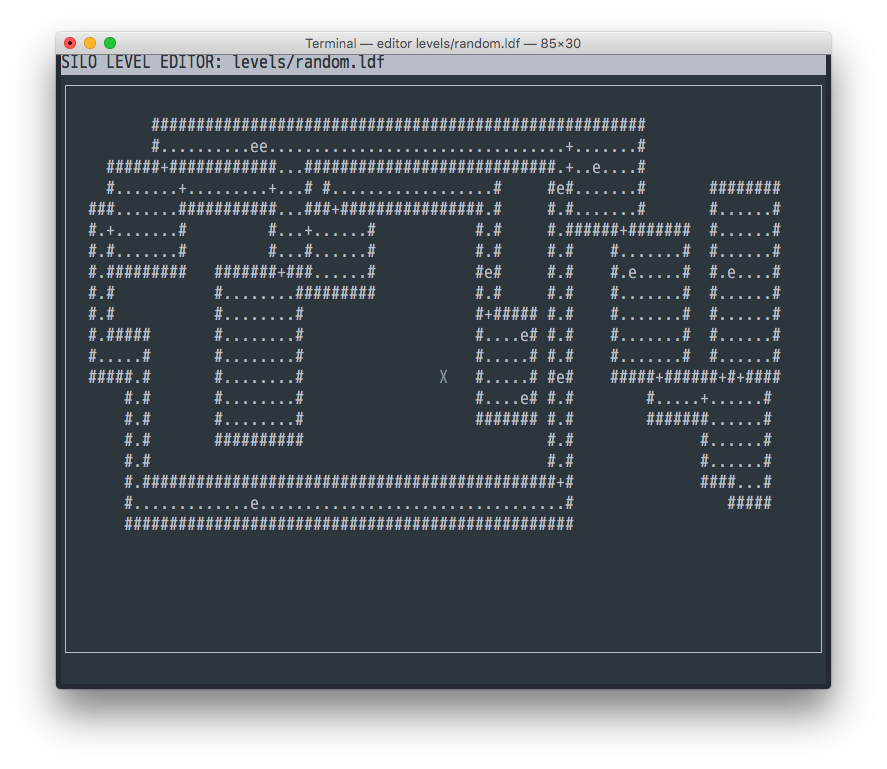
After playing with random dungeon generation for a bit, I seem to be satisfied with the results:

The above is displayed using ADOM notation - # represents a wall, . is a
floor tile, and + is meant to be a closed door. After fiddling about with a
few random dungeon generation ideas, I settled with the following.
The algorithm
- Start with a random point on a canvas.
- Create a room with random width and height. Don’t worry about walls yet.
- Select a few points on the sides of the room, put those in a stack. Save the direction in which the potential doors would point.
- Go through the stack, and try to add a room or a corridor (corridor is just a
room with a width or a height of 1). Higher chance of corridors seems to look
better and results in those wiggly passageways.
- Try to add a room a few dozen times with different random configurations. If no luck - give up and grab a new item from the stack. If couldn’t generate a continuation to the corridor - mark it as a loose end, we’ll clean those up later.
- If a room was added successfully - add a door where it connects to the previous room/corridor. Add a floor section if it’s a corridor connecting to another corridor.
- At this point one ends up with quite a few interconnected corridors, merged rooms, and all kinds of fun surroundings (my desired goal).
- Do the above until the stack is empty or a desired number of rooms has been generated.
- Clean up the loose ends from step 4.1. Remove loose corridor segments one by one until intersection with another room/corridor is detected.
- Add walls around the rooms and corridors, while also cleaning up any extra
doors we may have left behind when creating merged corridors or rooms.
- I simply used slightly modified depth first search starting inside any room and drawing walls wherever I could find floor/door not connected to anything.
- When encountering a door - check if it’s surrounded by walls or doors from the opposite sides. If not - remove the door and replace it with a floor tile. If any doors were adjucent to the removed door - requeue the door check on them.
- Perform steps 1-7 a few hundred times, saving the resulting dungeons each time. Pick the best candidate with the most desired features - like a number of rooms, breadth, square footage, longest corridors, etc.
A more detailed explanation of the steps is below. For now, here are a few more dungeons generated using this method:


I think dungeon generation is far more art than science, and I had a lot of fun tweaking all the different input parameters:
- Room size boundaries.
- Corridor lengths.
- Frequency of corridor occurrences.
- Number of exits from the room.
- Number of room generation attempts.
- Number of dungeon generation attempts.
- Final dungeon picking heuristics.
Last item on the list is the most interesting one - with few hundred dungeons as an input, picking the right one is rather important. I ended up settling on using max priority queue with a rough surface area of the dungeon as a key (it’s more of a breadth, really - how wide and tall it is). Then I’d sift through some top results and pick the one with the most rooms available. This results in the most fun-looking map which feels up most of the screen, while still usually not being too cluttered.
Here’s a breakdown of a simple scenario:
Steps 1 and 2
Pick a random spot on a canvas and generate a room of random size (4 x 3):
....
....
....
Step 3
Select potential spots for doors, let’s label them 1, 2, 3.
....2
....
....1
  3
I went for a uniform distribution by unfolding the rectangle and folding it back
in to get a proper coordinate on the perimeter. Now, stack contains coordinates
of [1, 2, 3] (along with the directions in which they are pointing).
Steps 4 and 5
Add a room or a corridor to a connector number 3. We’ll be adding the room to the right of number 3. Let’s assume random sends a corridor of length 5 our way. We’re happy with the corridor pointing either up, down, or right - so we let the random decide again: up.
     4
     .
     .
....2.
.... .
....3.
  1
We add the end of the corridor to the stack as number 4 (now [1, 2, 4]). We
also mark 4 as a loose end, in case we end up not adding a room to it. Dangling
corridors are never pretty.
Now, to replace number 3 with a door:
     4
     .
     .
....2.
.... .
....+.
  1
Adding another random corridor of length 2 to the point 4, pointing right. Replace number 4 with a floor segment, since point 4 was the end of another corridor. Remove point 4 from loose ends, add point 5.
     ...5
     .
     .
....2.
.... .
....+.
  1
Take point 5, generate a room of size 3 x 6. 5 becomes a door. Loose ends list is empty.
     ...+...
     .   ...
     .   ...
....2.   ...
.... .   ...
....+.   ...
  1
For simplicity’s sake, let’s assume we don’t want any more exits from this room.
Back to the stack of [1, 2]. Point 2 seem to not have much room for growth.
After a few unsuccessful attempts to place a room or a corridor there, we give
up:
     ...+...
     .   ...
     .   ...
.... .   ...
.... .   ...
....+.   ...
  1
Now for point 1: we get another corridor of length 3. Point 6 is now added to the loose ends list.
     ...+...
     .   ...
     .   ...
.... .   ...
.... .   ...
....+.   ...
  +
  .
  .
  .
  6
Let’s assume we run out of space and can’t add anything to the end of 6. We’re
done generating the dungeon. Our stack is empty, and our loose ends contains
coordinates of 6.
Step 6
Start with the loose end, and remove items one by one until a tile with multiple neighbors is encountered:
     ...+...
     .   ...
     .   ...
.... .   ...
.... .   ...
....+.   ...
  X
  X
  X
  X
  X
Viola:
     ...+...
     .   ...
     .   ...
.... .   ...
.... .   ...
....+.   ...
Steps 7 and 8
There are no rogue doors in this scenario, so all we need to do is add the walls:
     #########
     #...+...#
     #.###...#
######.# #...#
#....#.# #...#
#....#.# #...#
#....+.# #...#
######## #####
All of the steps above should be repeated a few hundred times with different dungeons, and then the best dungeon should be picked as a final one.
Did I miss anything? Was cleaning up “loose ends” too much of a hack? What should have I done differently?
Browsing MSSQL and Vertica from CLI
Notes to make sure I don’t forget how to do this in the future. First, install
mssql and vcli tools:
npm install -g sql-cli
pip install vcli
Encrypt desired database account passwords:
mkdir -p ~/.passwd
echo '$PASSWORD' | gpg --use-agent -e > ~/.passwd/$DB_ACCOUNT.gpg
Set up a set of aliases with the desired level of flexibility in ~/.bashrc to
avoid typing too much:
function _sql-helper-command {
  host=$1
  user=$2
  password=$3
  db=$4
  opt_query_file=$5

  if [ -z $opt_query_file ]; then
    mssql -s $host -u $user -p $password -d $db
  else
    mssql -s $host -u $user -p $password -d $db -q "`cat $opt_query_file`"
  fi
}

function _vsql-helper-command {
  host=$1
  user=$2
  password=$3

  vcli -h $host -U $user -w $password
}

# Usage: `sql` for interactive mode, `sql filename.sql` to execute a file.
function sql {
  opt_query_file=$1

  host='$SOME_HOST'
  user='$SOME_USER'
  password=`gpg --use-agent --quiet --batch -d ~/.passwd/$SOME_FILENAME.gpg`
  db='$SOME_DB'

  _sql-helper-command $host $user $password $db $opt_query_file
}

# Usage: `vsql $VERTICA_HOST`
function vsql {
  host=$1
  user=`whoami`
  password=`gpg --use-agent --quiet --batch -d ~/.passwd/$SOME_FILENAME.gpg`

  _vsql-helper-command $host $user $password
}
Replace $SOME_USER, $SOME_HOST, $SOME_DB, $SOME_FILENAME above with
specific user, host, DB, and filenames respectively. I usually make a bunch of
aliases for different environments/machines I use: sql-prod, sql-dev,
sql-local or vsql-host1, vsql-host2.
Thoughts on travel
I like traveling. I’ve been living on the road on and off for the past half a year, traveling across the US. This whole time I live in my car, and quite frankly, I enjoy it.
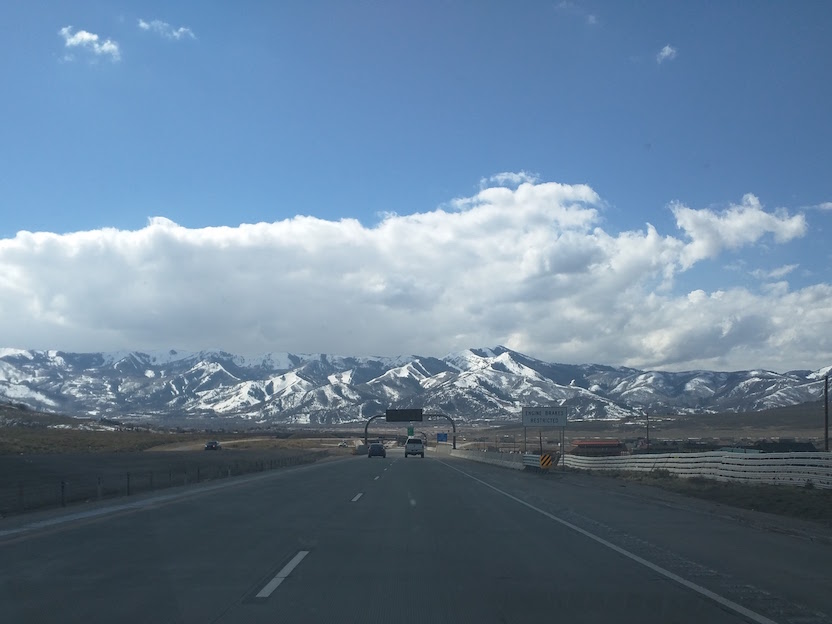
Passing beautiful vistas and not having a place to call home are two sides of the same coin. It’s something that gives me time to think.
From a very young age we surround ourselves with objects of comfort. It all starts with toys we have as children. First things we own. Our room. Friends. House. Job. Town. Country. We take comfort in certain parts of the environment. Be it objects, people, or places.
After getting rid of most of my belongings and starting my journey - I felt like a lot of things which made me feel comfortable and safe were gone. It made me feel very exposed to the world.
When objects of comfort are gone, one has to face a lot of their own demons. Issues hidden by a security blanket are let out to roam freely. Living on the road amplifies the experiences I have: the ups are high, and the downs are low. A wider specter of emotions is thrown onto me.
I guess there’s a reason why majority of people all live in a similar manner. It’s comforting. It’s a void inside you that needs filling. It’s things we don’t want to think about, deal with.
But there’s also strength in letting go. Items, places, people. Thoughts. Ideas. It’s a way of growth. To become a better version of yourself, you need to be destroyed a little. Deal with the darkness within.
Some days it’s exhausting, some days it’s revitalizing. But that’s why I do what I do.
Living in a car for 5000 miles
I have set on my journey across the United States and back a few months ago. It’s a fun thing to do, and really gave me a breath of fresh air. I watched elephant seals and whales on a California coast, spent what felt like days stuck in LA traffic, ran from a blizzard, made it through a flash flood, passed a tornado, celebrated New Year’s on the road…
But don’t let me get ahead of myself.
What’s inside
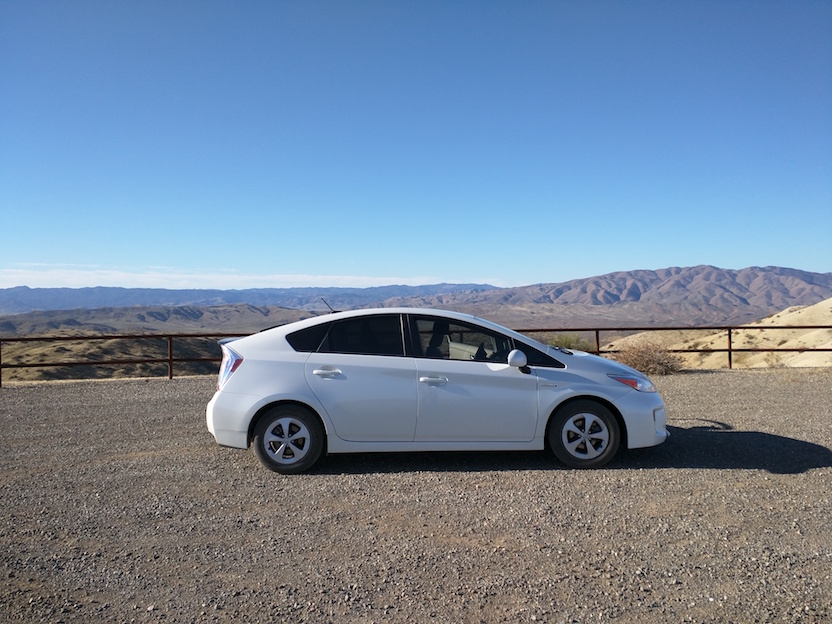
My path started in San Francisco Bay Area, a place I’ve been lately calling home. I tried out living out of a Prius before, thus not having a sturdy place to call home wasn’t really a shock. After only a few weeks I didn’t feel like anything is out of place - being on a road feels just as normal as renting a house.
Living areas
First - the packing and organization. Just like in any living space, zoning is important. Space inside a car is separated into 5 major areas:
- A driver’s seat, used solely for driving. No other activities are permitted, and the less time is spent in the driving seat - the better. This helps one to stay alert when on a road.
- Front passenger seat. There’s not enough room to sit here due to the seat being moved to the front all the way (to give the most space for the bed). I usually just keep a backpack here (which I always take with me, so this area stays empty when I’m not in the car).
- Rear passenger seat behind a driver. This is a primary seat for activities - reading, fiddling around with a laptop, having some tea or a snack. A cooler is taking up the leg space, but it’s never a problem: in the wilderness I put it outside, and nine times out of ten I don’t want to sit with my legs down (since that’s the position I drive in).
- A bed. Level surface, approximately 6 and a half feet long. Sleeping mat, winter queen sized sleeping bag folded in two as a second mattress, a summer sleeping bag, two pillows, and a plaid on top (for added coziness).
- Additional cargo storage under the bed. Water supply, out-of-season clothes, shoes.
- Cargo area in the rear. A suitcase with food and clothes, toiletry kit, and miscellaneous stuff. Some things I don’t access often are in a secondary cargo compartment Prius has underneath the cargo surface.
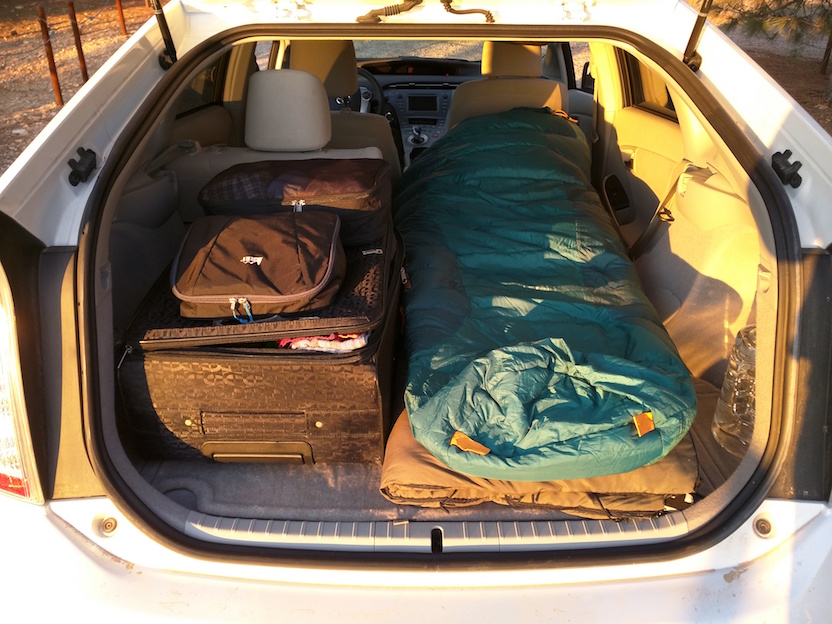
After about a week, moving between the areas within a car becomes surprisingly easy and natural. I usually put on a hand brake, lock the car, leave my shoes in a driver’s seat and move to the back sit or the bed.
Food, water, and cooking
Being prepared is essential for living on the road, so I keep a lot of food and water in the car. I make it a rule of thumb to keep 6-8 3-liter water jugs in the car, which amounts to 18-24 liters (5-6 gallons) of drinking water.
For boiling water I use RoadPro Smart Car Pot. I’ll upgrade to something better eventually, since it requires me to plan too far in advance - it takes 20-25 minutes to get water to boil.
I also have teabags and coffee with me. I used to have instant coffee, but it tastes terrible compared to the real thing. Now I use a simple one-cup coffee maker (the one where coffee drips through a funnel) to brew my pre-ground coffee.
When it comes to food - I use rice, grains, and pasta as a base for some meals. Canned goods like corn, peas, mixed veggies, pasta sauce, or chili add a nice touch to the base. I heat up canned soups with a backpacking stove when I’m not in the mood for cooking whole meals or doing the dishes.

I have a 16-qt Stanley Adventure Cooler which keeps items inside cold for nearly three days (or practically indefinitely if I’m up in the mountains where it’s cold). When I’m preparing to be out in the wild, I fill it up with eggs, meat, cheese, veggies, fruits, and berries.
In addition to everything listed above I always carry 6 days worth of MREs and water in an emergency backpack underneath in the cargo compartment in case I am ever stranded somewhere.
Washing the dishes
For cleaning my cookware I’m using a backpacking approach I’ve read about on WikiHow. I spray the dishes with some natural cleaning solution, let them sit for a bit, wipe it off with paper towels, and then thoroughly rinse degreased dishes off in a 5-liter travel kitchen sink.
Clothing
Most of my clothing is pretty regular - pants, T-shirts, shirts, cardigans, sweaters, jackets. However I did switch to using merino wool for all my base layers: underwear, socks, compression tops and bottoms. While being significantly more expensive, merino wool is much more comfortable to wear, and it stays clean for much longer than normal clothes.
All the things I wear day to day fit in a backpack. When I stayed in New York City for a few weeks without a car I had everything I needed in it:
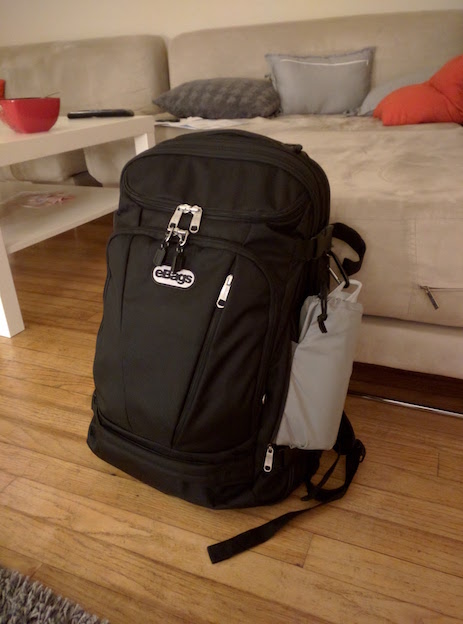
In addition to all of the above, I carry a few pairs of shoes and an additional outer layer I wear when I anticipate to be near a campfire. That goes in a storage bin under the bed.
Laundry
I started with visiting laundromats and just carrying a lot of coins with me. But after a while, a number of items which require hand washing or delicate care have increased - mostly due to above specified merino wool base layers.
I’ve been looking for an excuse to try out Scrubba wash bag I’ve heard so much about - basically a dry sack for washing clothes. I found it to be quite convenient and not at all cumbersome to use.
While I still use laundromats for washing bulkier items, I hand wash my easy to clean and quick to dry base layers.
Sleeping
A self-inflating sleeping pad and a winter queen-sized sleeping bag folded in half create a great mattress. I sleep in a summer sleeping bag, with an added sleeping bag liner and a few travel pillows.
I run AC in the car throughout the night. While keeping the temperature pleasant, it tends to dry out the air and results in a major case of a sore throat in a morning. I use a small travel humidifier which connects to a USB power supply to regulate the humidity in the car at night.
Entertainment
Boredom seems to never be a concern with this lifestyle. I use laptop for rare acts of writing, and a Kindle for reading during the little downtime I have. I also have a little harmonica I hope I’ll learn to play one day. And some juggling balls I throw around once in a while.
A few words on stealth
While I enjoy staying at campsites, a large portion of my journey involved staying in urban areas. Looking inconspicious is a big deal when you’re relaxing in a car - it’s not fun when somebody comes knocking on your door (didn’t happen to me though).
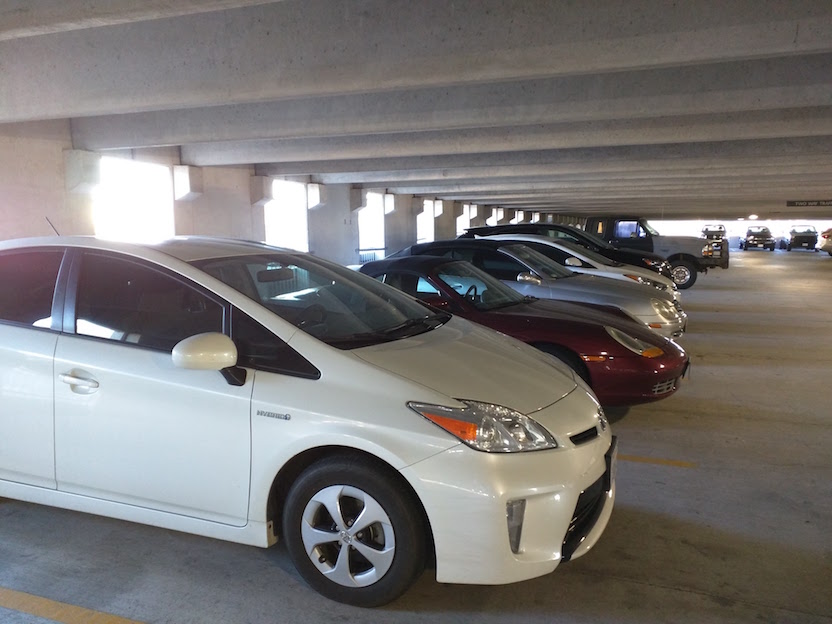
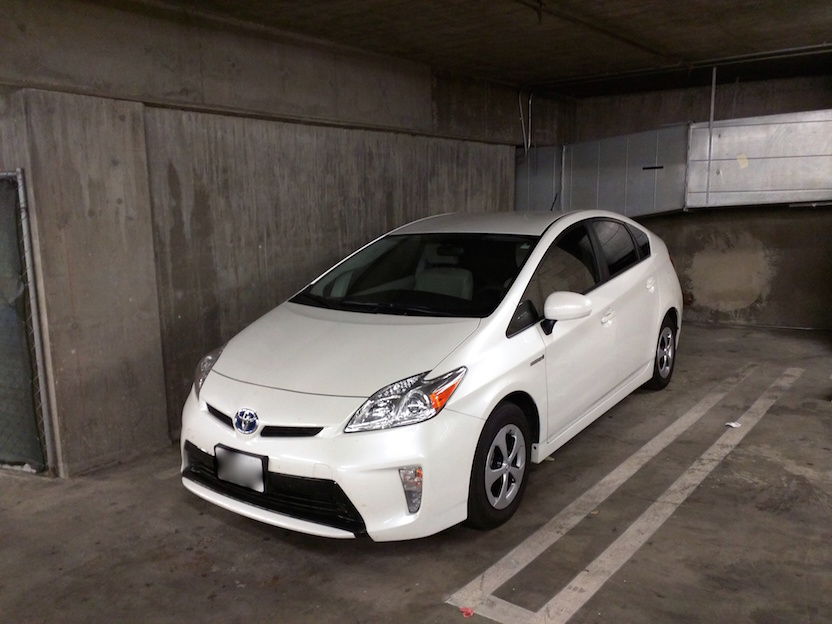
The fact that it’s a white-ish Prius helps a lot. Car dwelling is not a first thing people think when they see a tiny city car parked on the side of the road. Tinted windows (heavier tint in the rear, lighter in the front) are enough to shield the dweller from the passers by. A blackout curtain separating the front seats from the back area and covering rear windows is enough to cover one from curious eyes peering inside the car.
Here’s how the car looks in ful lighting with the curtains down, if you look closely you can see the black fabric behind the seat backs. But most likely you’ll just pass the car:
Finding a place to stay boils down to four simple steps for me:
- Drive around in advance, find a place where it’s easy to blend it. I prefer a balance between empty and fully crowded lots. Avoid parking at a chosen area until later in the evening.
- Arrive late, hide in plain sight, park near similar cars. Don’t tuck in somewhere far and look suspicious.
- Be respectful to whichever place you picked for the night. If possible, leave it cleaner than it was when you arrived. Try not to be in and out of the car too much either.
- Leave early. Do not stay at one place multiple nights in a row. Avoid easily recognizable patterns when returning to the same spot.
Final thoughts about my journey
I traveled for an approximate of three weeks, and ended up hunkering down in New York City for another month while leaving a car outside the city.
I gave up my apartment back in Bay Area for the duration of the travel, and it feels liberating. It’s comforting to know that one doesn’t need to own a place to live a happy and fulfilled life. Even further, living in NYC for weeks with a single backpack worth of posessions and realising I don’t need anything else was an eye opening experience.
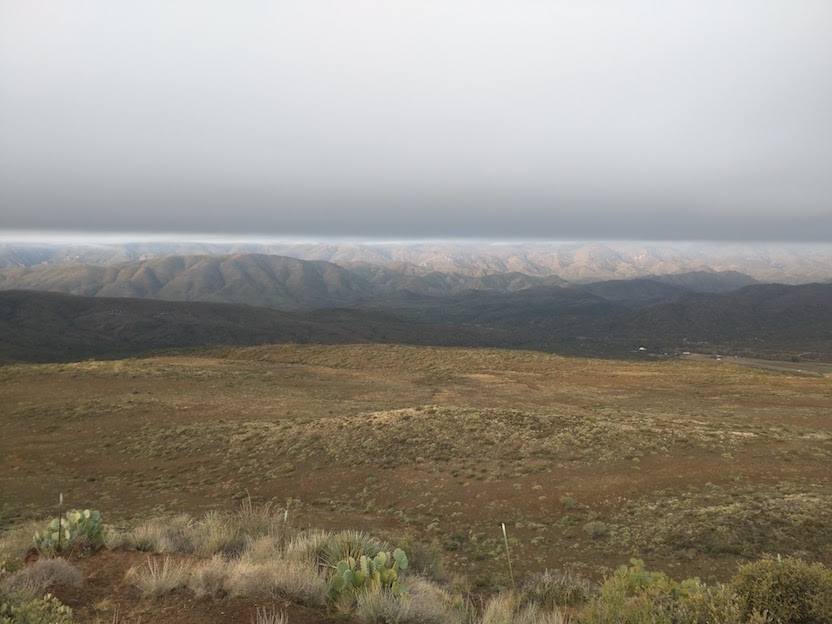
Turns out I really don’t need much stuff to enjoy life.